About
For anyone who likes making stuff, they know that the interest comes with a certain set of spatial requirements. For myself, I’ve been able to get away with one of those glass-top adjustable drafting tables for years. However, as projects start to get bigger and heavier (or as processes get hotter or more percussive) the glass of the tabletop started to feel like less and less of an appropriate fit. I also had some quickly increasing storage needs for things like tools and project components that the current system also couldn’t accommodate.
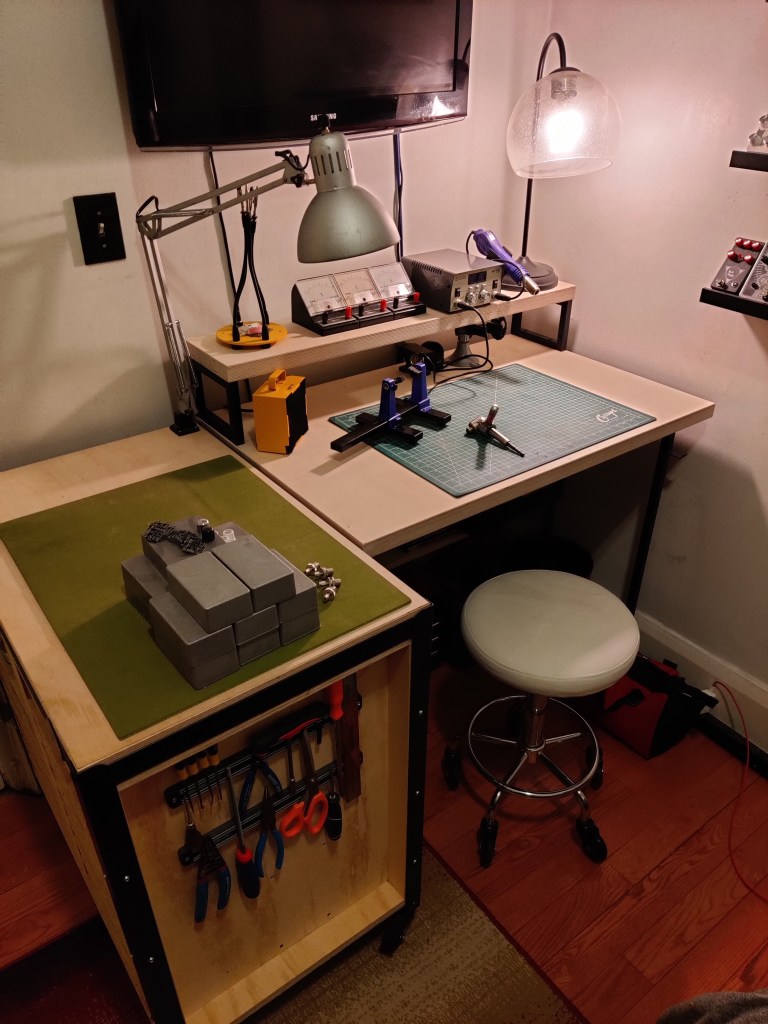
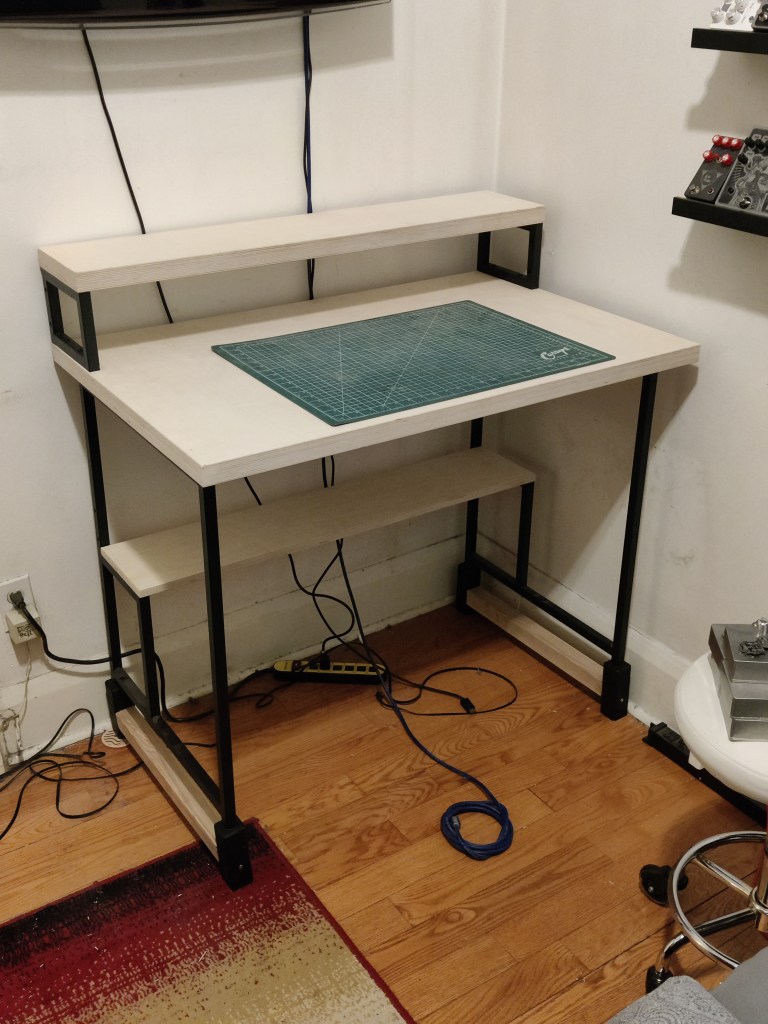
As a result, I set out to build myself a space-friendly little work station. The furniture itself consists of two major parts. The first is essentially just a desk with some additional shelving storage, and the second is a rolling storage/project cart.
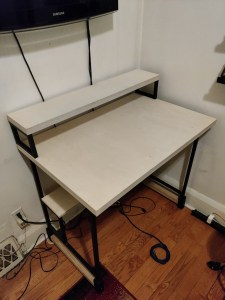
Desk: Pretty straight forward. I managed to find some metal hardware off of a local desk that was getting thrown away. I only really needed the metal frame and gave it a good ol’ sand and spraypaint to make it like-new again. I built a 1-1/2″ thick wooden tabletop by laminating some thick Baltic birch plywood together, and also did so for an additional riser shelf I added towards the back of the desktop. I also hid away a little shelf underneath the desk for more additional storage. The only issue was that the height of the metal frame I salvaged meant that the desk sat much lower than I prefered. I built some risers from wood and bolted them to where the feet of the previous desk would have connected. Now I can fit my toolbox underneath, as well as other odds and ends.
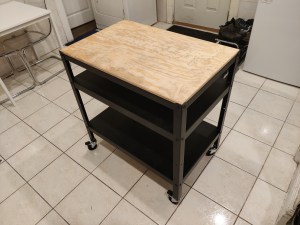
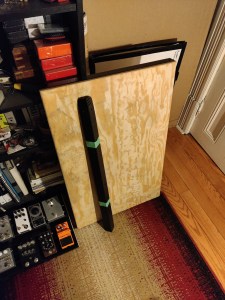
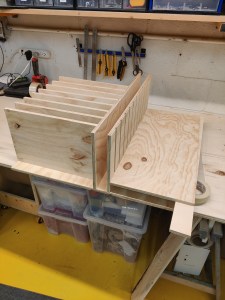
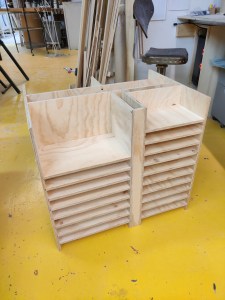
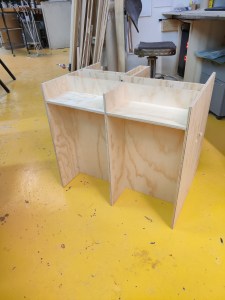
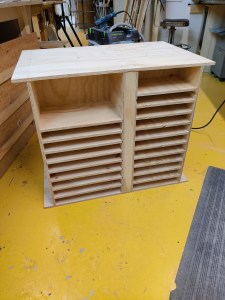
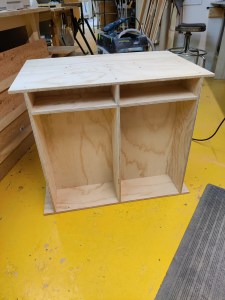
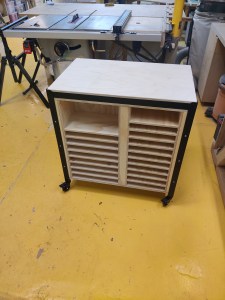
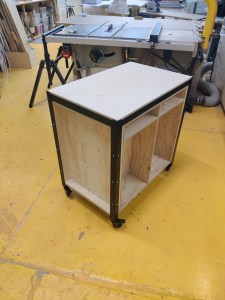
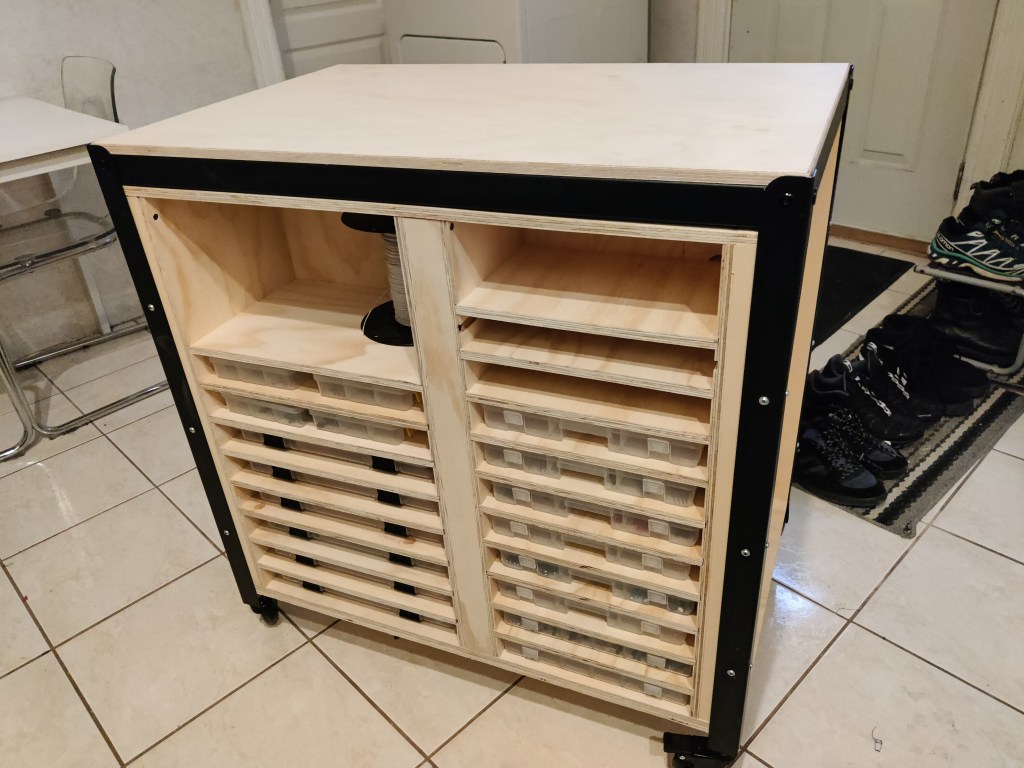
Storage Cart: The storage cart is retrofitted from a cart I bought used for $60 from a company that resells various pieces of furniture/equipment/etc. that are used in film productions around Toronto. Since Toronto is a pretty popular film destination, it isn’t too hard to catch a sale like this. I got super lucky and the cart had been marked down twice by the time I got to it so I knew I had to grab it. I took some time with the design – and one sheet of plywood later, I now have a home for all my electrical components. Everything has been designed around parts organizers that many of these coponents were already stored in. I also got some silent casters for it, and built an adapter for an old desklamp so that it could be affixed to the card. It has a matching Baltic birch plywood top and black metal hardware. The best part is that it’s been made to sit perfectly flush with the neighboring desk giving me tons of workspace for such a tiny corner of my room.
Process Documentation